Overview
This tutorial explores the design and development of a Microservice.
Microservices can be used to manage a wide variety of services on numerous types of devices, such as:
-
network equipment (routers, switches, UTM, etc.)
-
virtualization infrastructure managers (VMWare, AWS, Openstack, etc.)
-
Linux servers
Lab setup
The first step in Microservice design and development is to have a device to manage.
This tutorial assumes you have a properly configured, running MSactivator™.
If you have followed the quickstart guide you should have a running MSactivator™ with a Linux managed entity, created and activated.

Microservice design
As a first example of Microservices, we will start with managing this Linux Managed Entity.
On Linux, the CLI command to list the users is:
cat /etc/passwd.
To create a new user use the command:
useradd
and to delete a user use the command:
userdel.
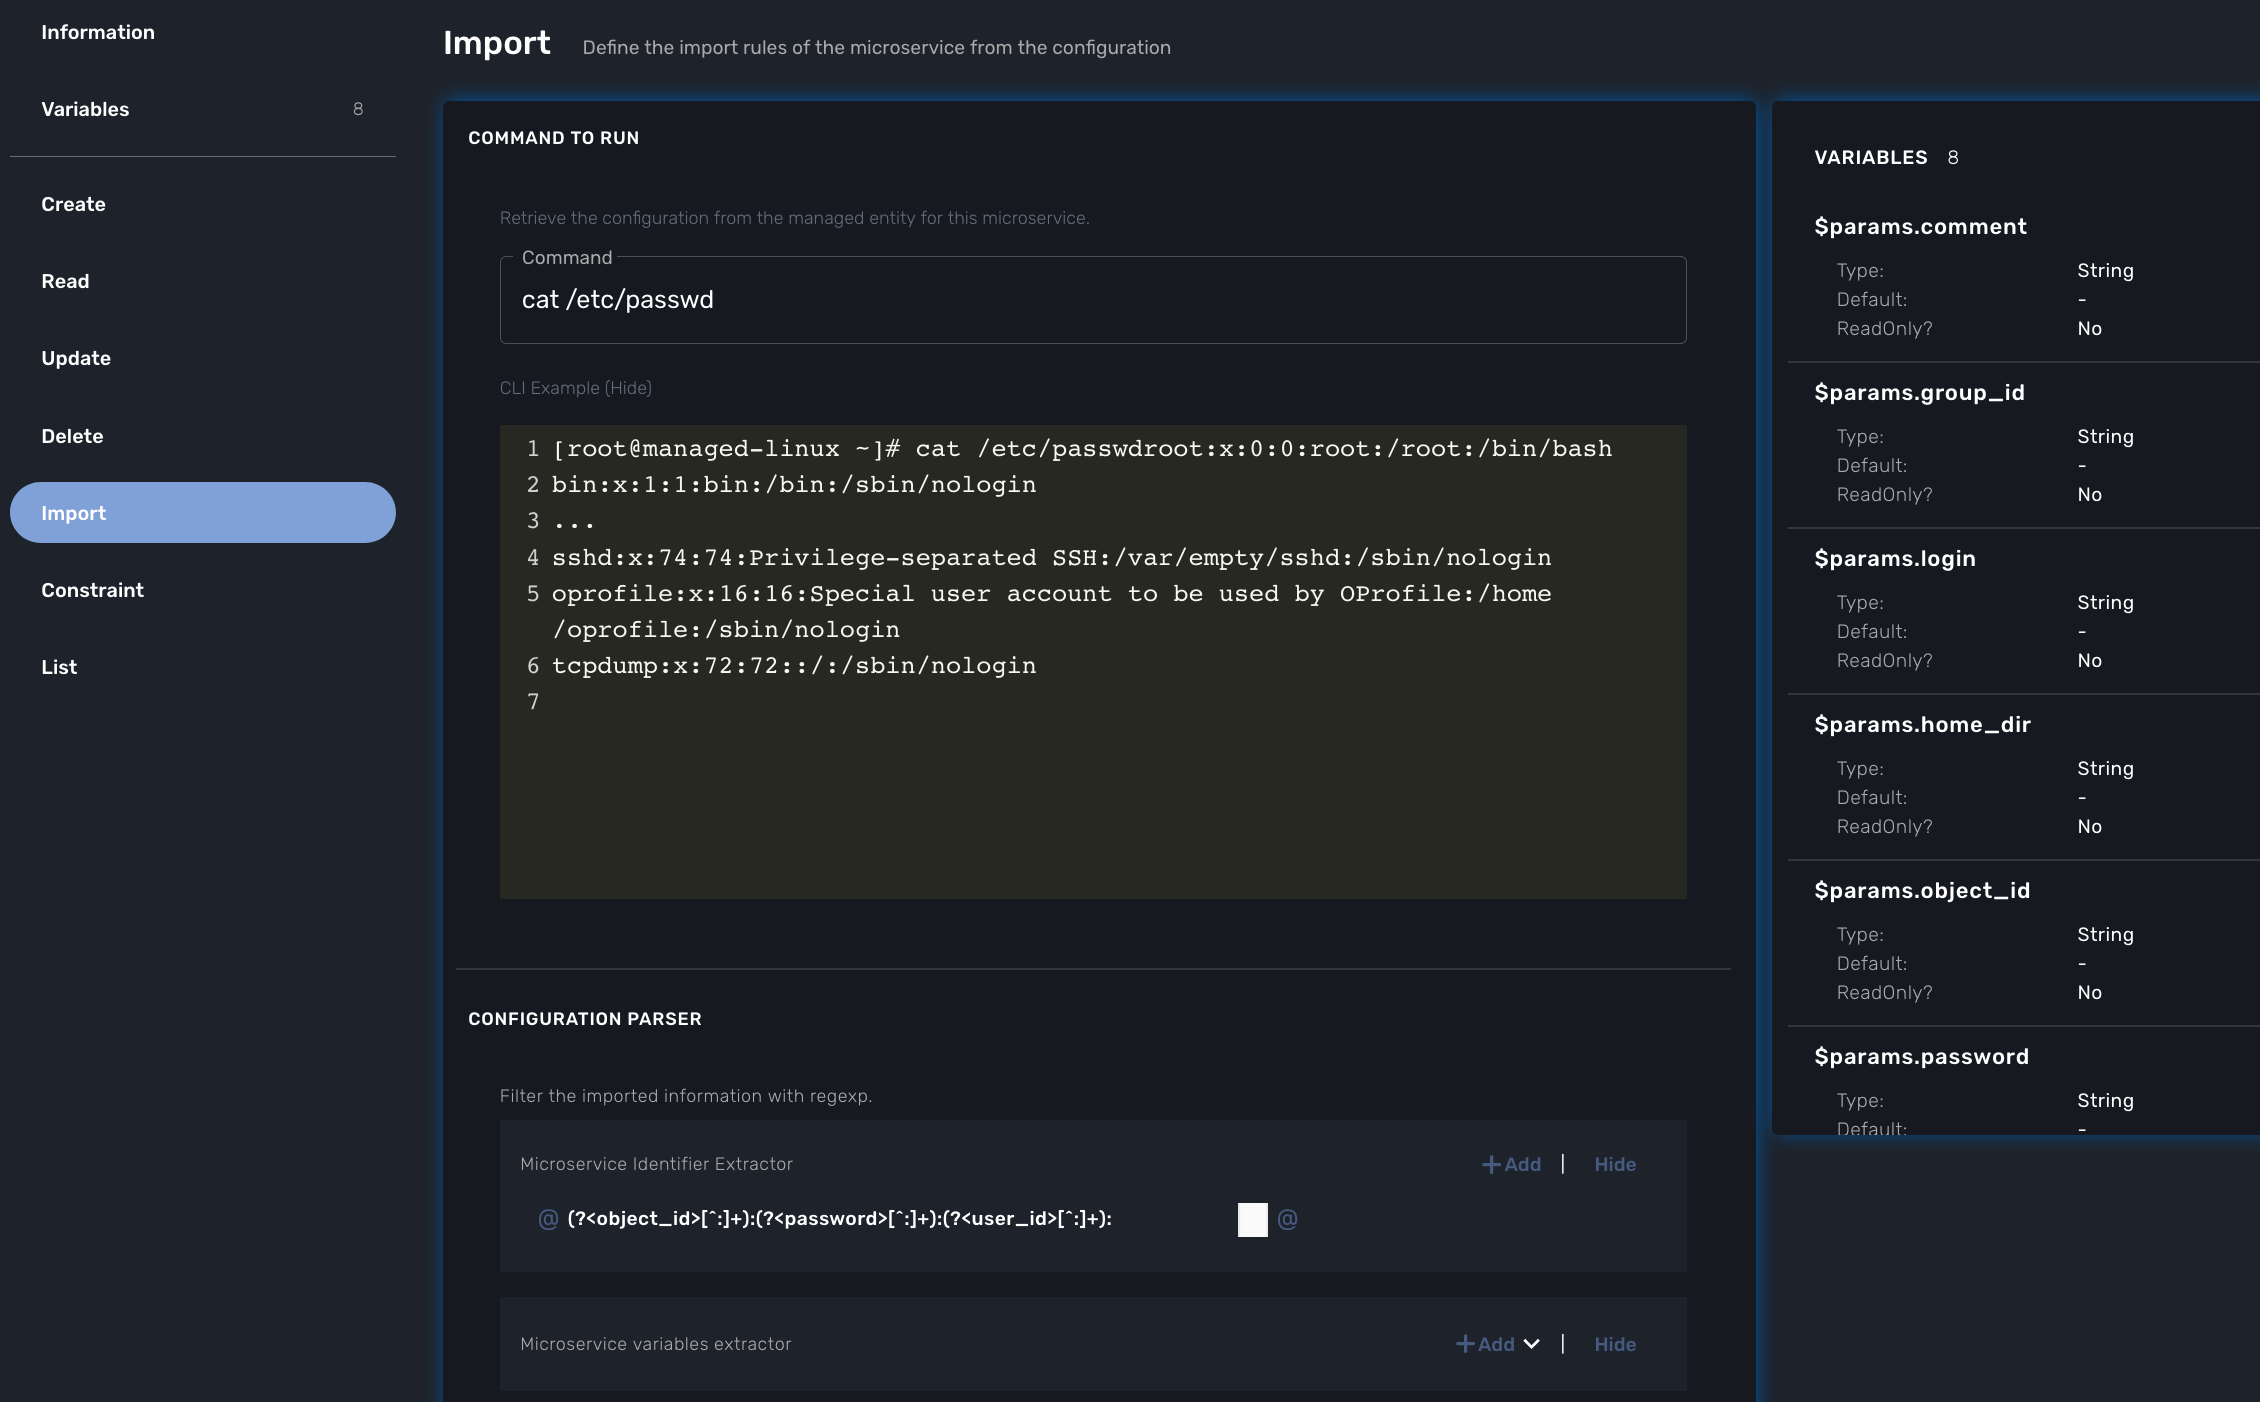
[root@managed-linux ~]# cat /etc/passwd
root:x:0:0:root:/root:/bin/bash
bin:x:1:1:bin:/bin:/sbin/nologin
...
sshd:x:74:74:Privilege-separated SSH:/var/empty/sshd:/sbin/nologin
oprofile:x:16:16:Special user account to be used by OProfile:/home/oprofile:/sbin/nologin
tcpdump:x:72:72::/:/sbin/nologin
The list of users in /etc/passwd contains the system users that we want to exclude from the scope of the Microservice. We will cover this later in this tutorial.
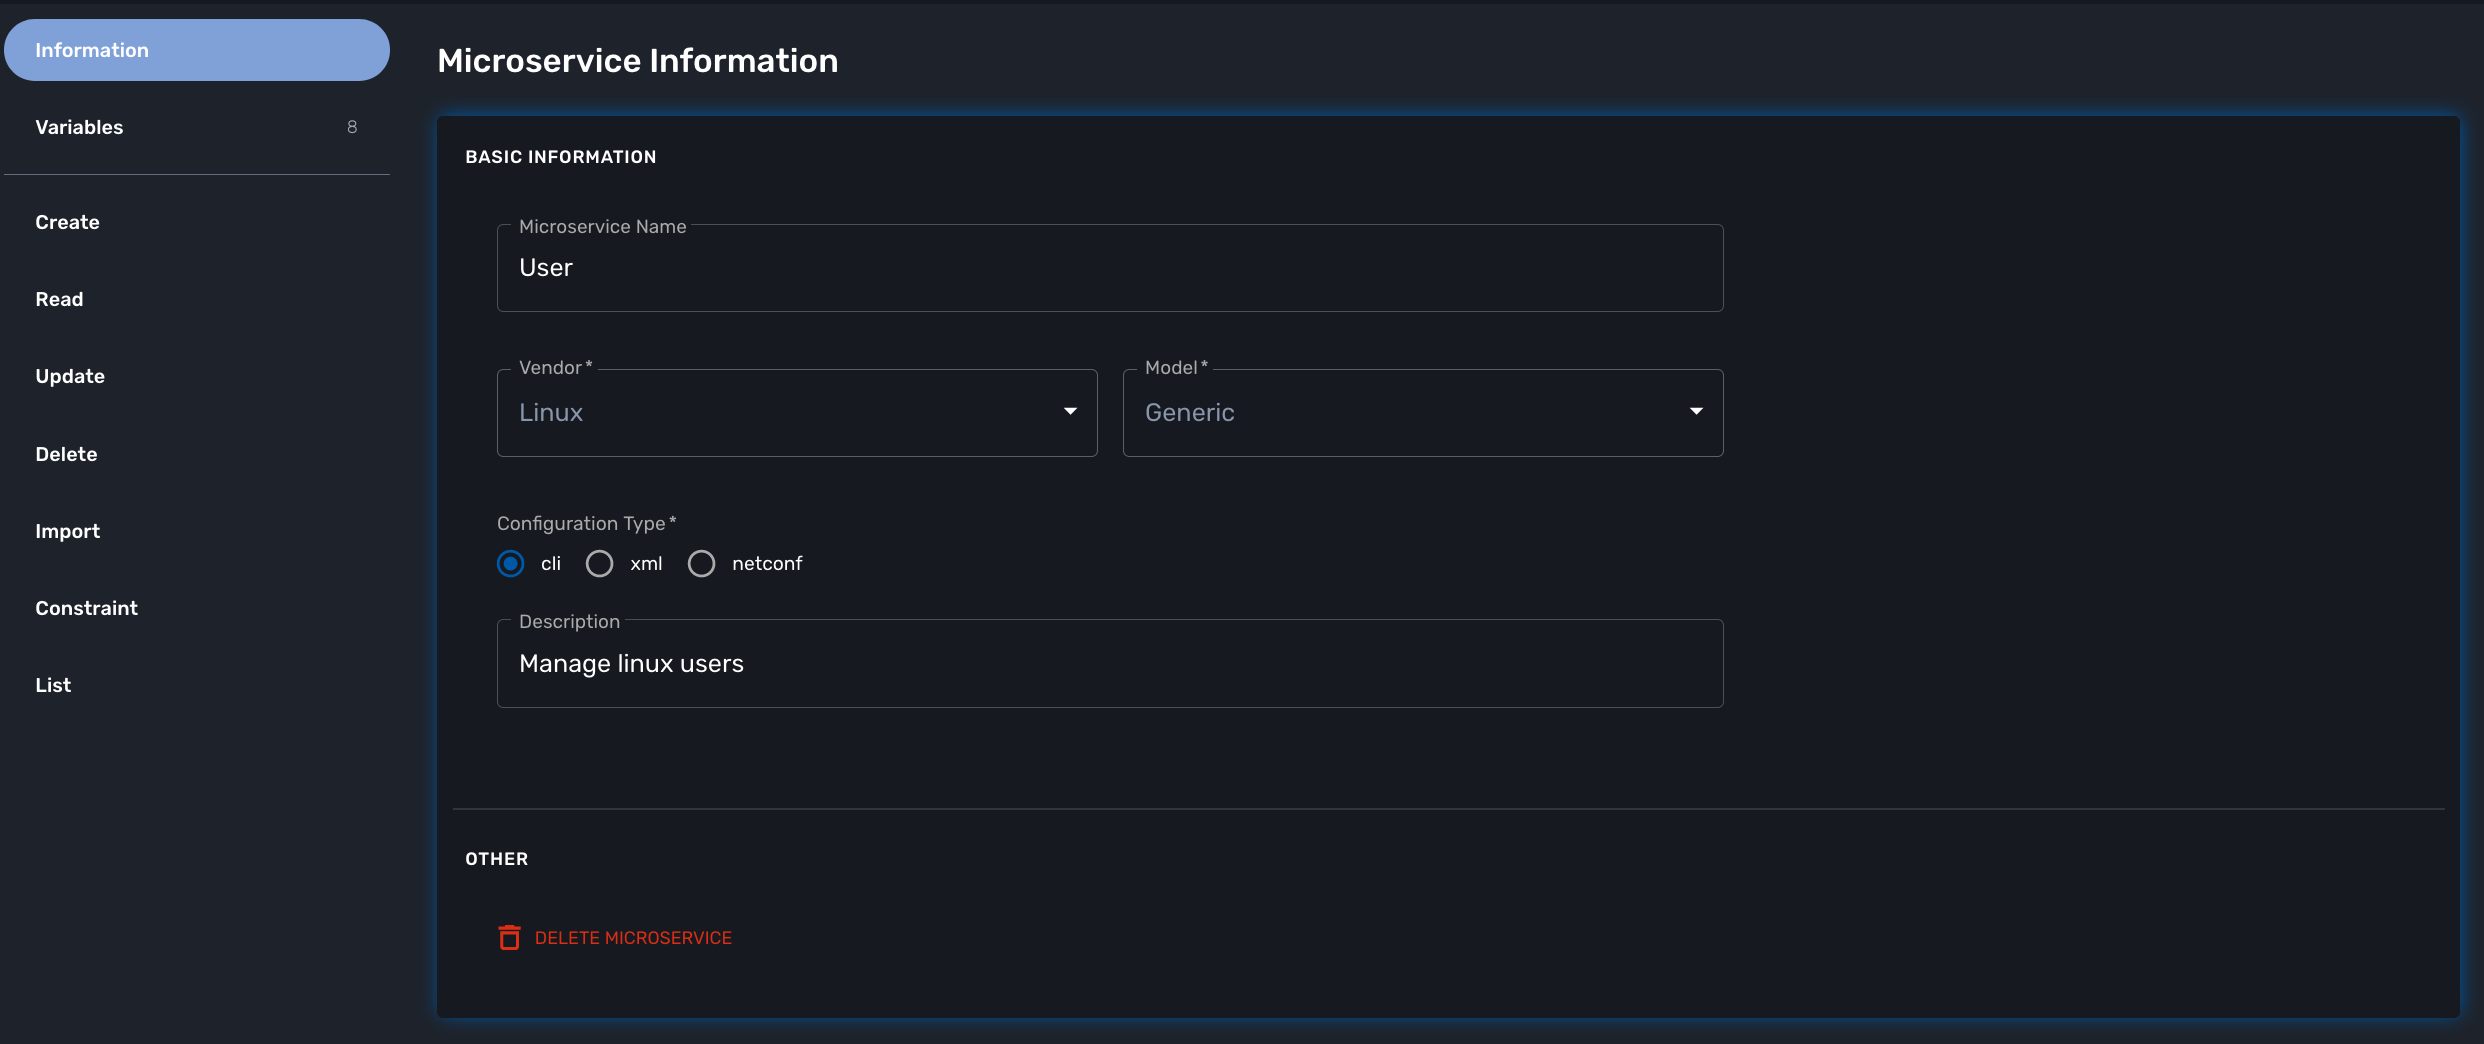
Create a new microservice
Click on the "Integration" from the left menu, select the tab "Microservices" and click on "Create Microservice"

Import the users with the IMPORT function
The result of the CLI command cat /etc/passwd is composed of a line with the format:

-
Username: Used when user logs in. It should be between 1 and 32 characters in length.
-
Password: An "x" character indicates that an encrypted password is stored in /etc/shadow file. Please note that you need to use the passwd command to compute the hash of a password typed at the CLI, or to store/update the hash of the password in /etc/shadow file.
-
User ID (UID): Each user must be assigned a user ID (UID). UID 0 (zero) is reserved for root. UIDs 1-99 are reserved for other predefined accounts. UIDs 100-999 are reserved by the system for administrative and system accounts/groups.
-
Group ID (GID): The primary group ID (stored in /etc/group file)
-
User ID Info: The comment field. This allows you to add extra information about the users, such as user’s full name, phone number etc. This field is used by finger command.
-
Home Directory: The absolute path to the directory the user will be in when they log in. If this directory does not exists then users directory becomes /.
-
Command/Shell: The absolute path of a command or shell (/bin/bash). Typically, this is a shell. Please note that it does not have to be a shell.
Now let’s build the IMPORT function with the parsers to extract the information listed above.
Firstly, we have to decide how the Microservice ID (the mandatory variable name "object_id") will be extracted. In this case, since the username is unique on Linux, the obvious choice is to use the username field as the object_id.
The regular expression to extract the fields from the result of cat /etc/passwd is:
@(?<object_id>[^:]+):(?<password>[^:]+):(?<user_id>[^:]+):(?<group_id>[^:]+):(?<comment>[^:]*):(?<home_dir>[^:]+):(?<shell>[^:]+)@| it may be useful to use an online regular expression tester when developing and testing regular expressions. One such online tester can be found here: http://lumadis.be/regex/test_regex.php (see reference below) |
Once validated, this regular expression can be used in the field "Micro service identifier extractor" of the IMPORT function builder:

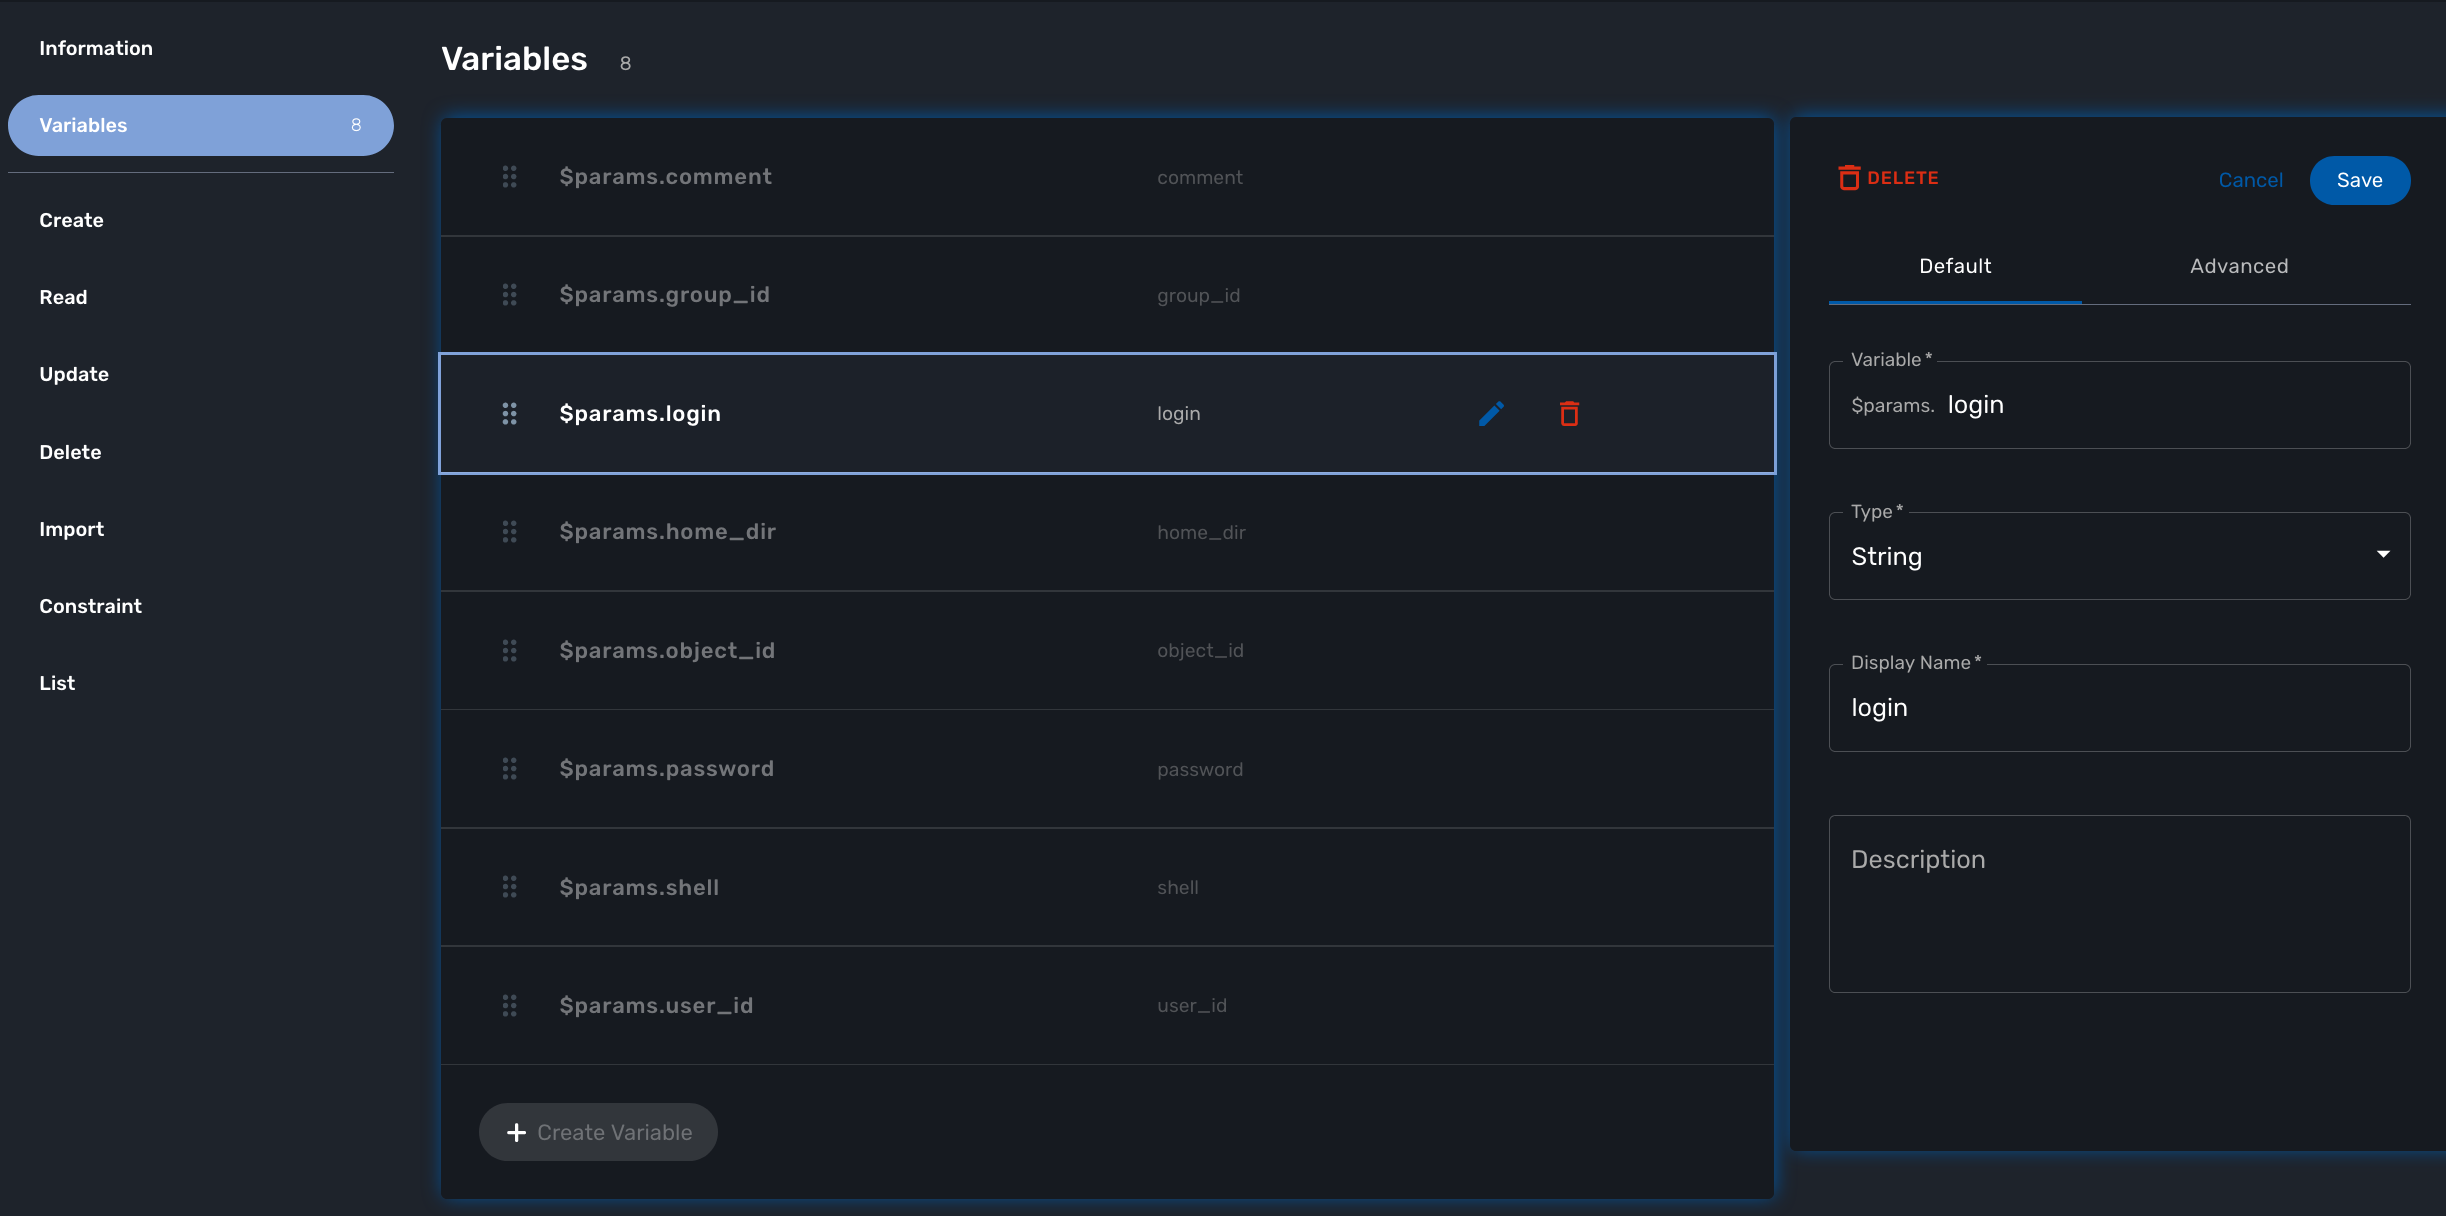
| the variables such as object_id, password, have to be created in the variable section of the Microservice. |
Variable creation
Variable are user to store the Microservice instance state in the database.
To create a variable, you need to go to the "Variables" section in the left menu and click "Create Variable".
When refering to a variable in the Create/Update or Delete functions, you will always have to prefix them by $params. (see below).
This is why the UI to create the variable is showing the string "$params."
|

For more detail on Microservice variables and type, you can go to the documentation about the microservice editor
Run the first test
In order to use your microservice, you need to associate it to a managed entity with a deployment setting and use the synchronization button from the microservice console under the tab "Configure".
Save your work, run the synchronization, and view at the result.
Add and remove users with the CREATE and DELETE functions
On Linux, the CLI command to add a user is:
useradd -m -d HOME_DIR -c COMMENT -p PASSWORD LOGINand to delete a user is:
userdel -f -r LOGINSince it is possible to set the password as a parameter of the user creation, you need to modify the definition of the variable "password" and make it visible and mandatory (but only in the edit view).
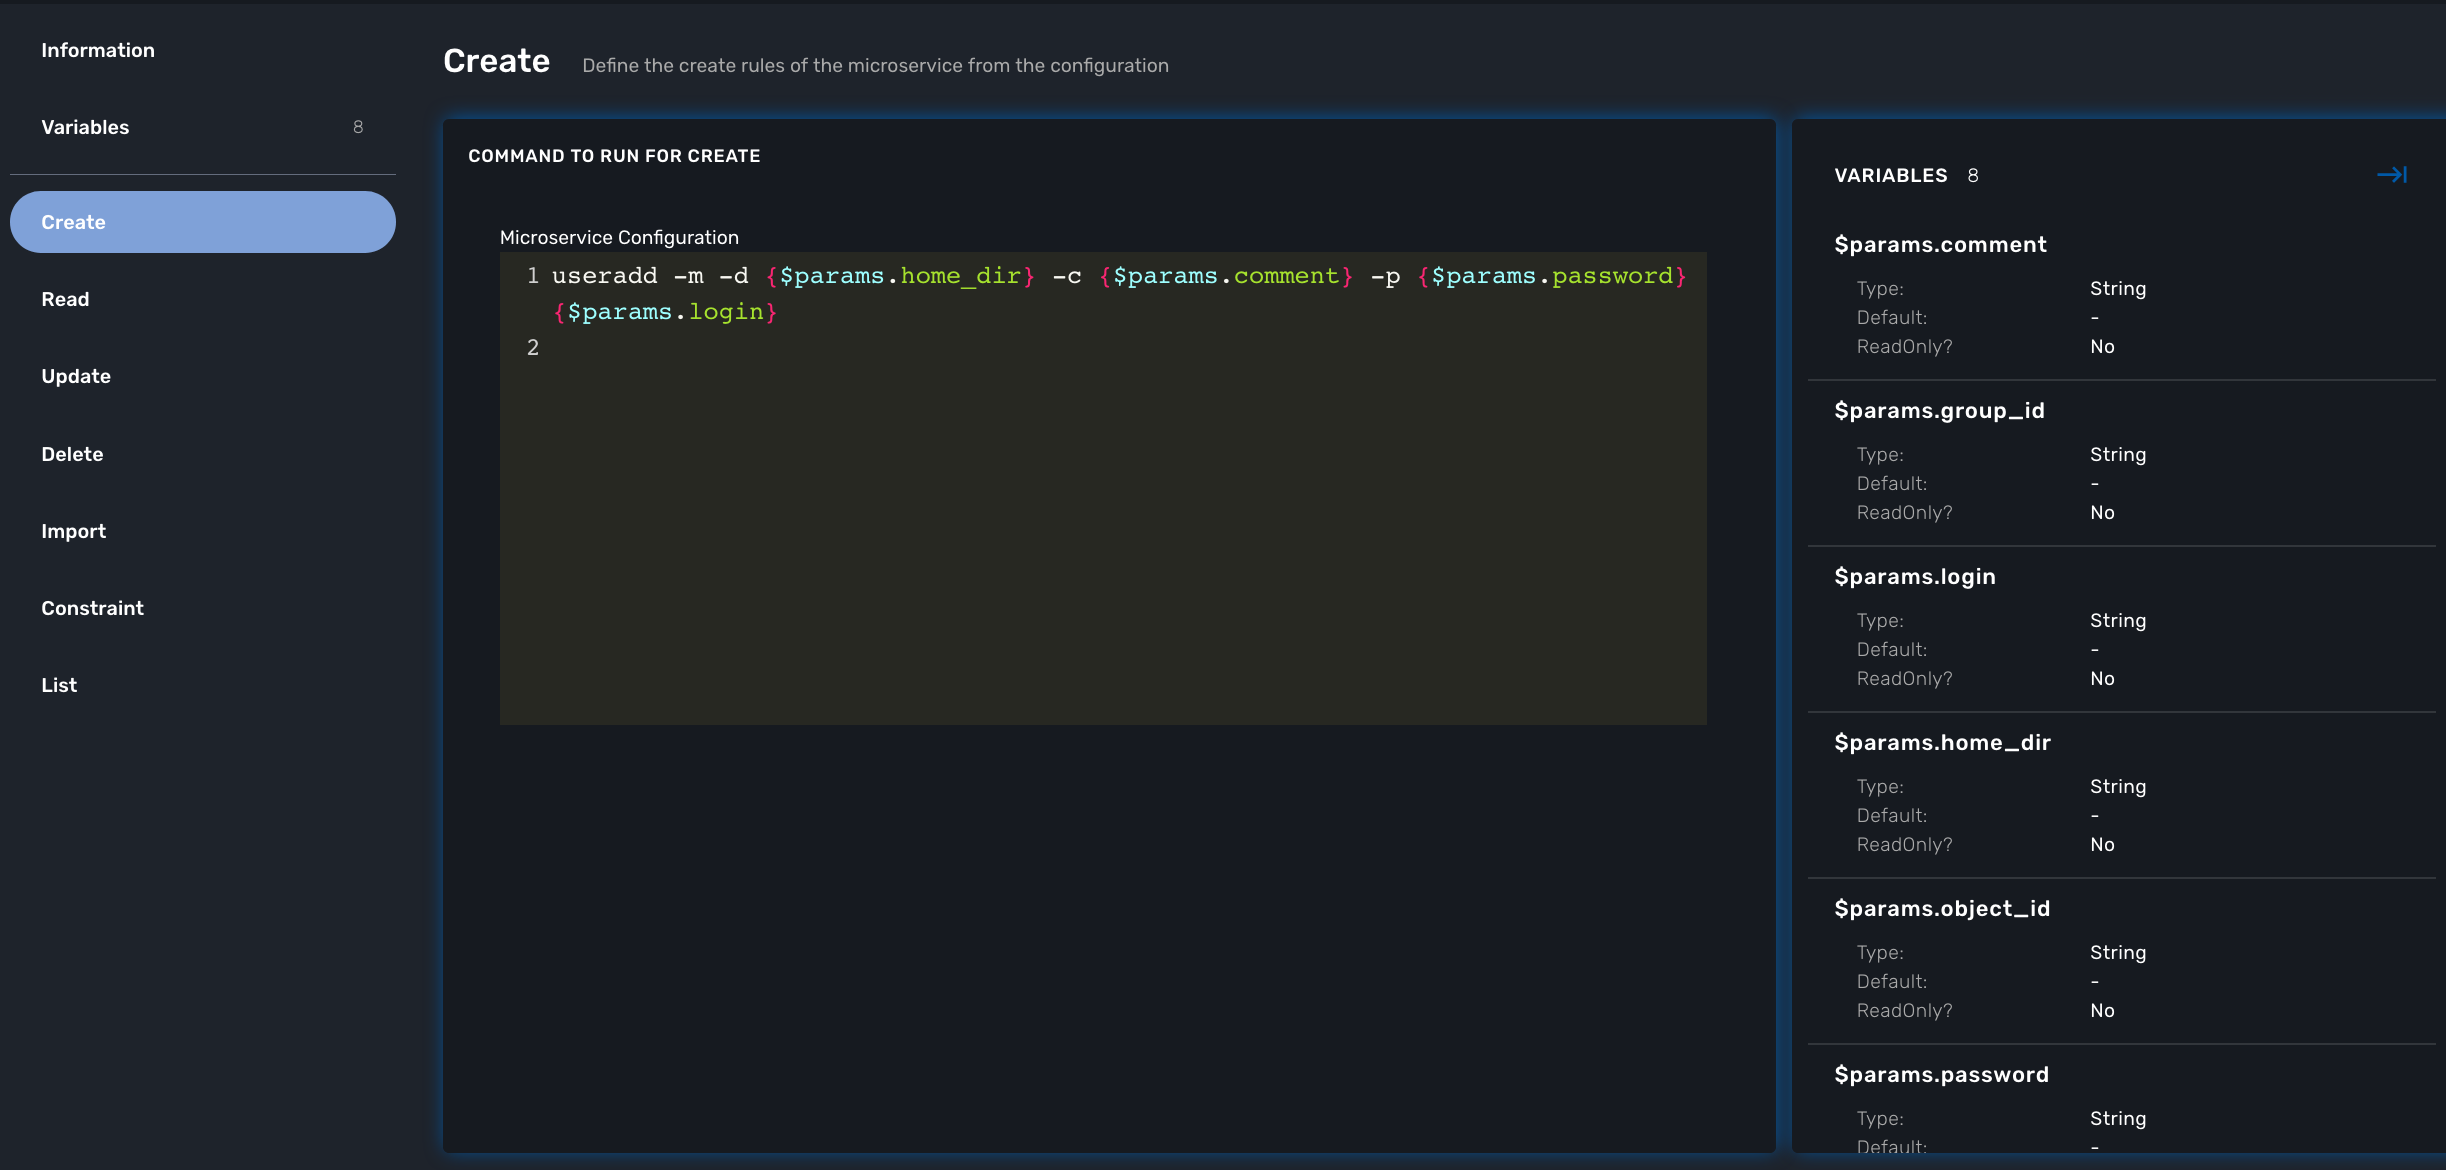
You are now ready to implement the CREATE:
useradd -m -d {$params.home_dir} -c "{$params.comment}" -p {$params.password} {$params.object_id}
and the DELETE:
userdel -f -r {$users.$object_id.object_id}| the use of the syntax {$users.$object_id.object_id} in the implementation of the DELETE. |
$users is the name of the Microservice definition file as created in the repository: users.xml. This syntax is used to get values from the MSactivator™ database, where Microservice instances are stored. The syntax has to be used when implementing a DELETE because the DELETE must delete the entry from the database AND remove the configuration from the device (in this case we want to delete a user).
Going further
With this simple implementation you can manage users on a Linux system, but there are some additional use cases that you may want to address:
-
Is it possible to ignore the system users when importing (for example: bin, daemon, adm,…)?
-
What if no comment is provided?
-
What if no home dir is provided?
How to ignore the system users
In order to ignore system users during the import, you have to find criteria to help differentiate system users from the users created by the system admin. You can chose to ignore all users that do not have the home directory under /home. The regular expression would then look like:
@(?[^:]+):(?[^:]+):(?[^:]+):(?[^:]+):(?[^:]*):(?/home/.+):(?[^:]+)@This regular expression will exclude all users that do not have a home directory under /home, but the system users below will still be imported:
oprofile:x:16:16:Special user account used by OProfile: /home/oprofile:/sbin/nologin
Since the shell is not part of the parameters that we have exposed in the creation form, you can decide to import the user that have /bin/bash as shell:
@(?[^:]+):(?[^:]+):(?[^:]+):(?[^:]+):(?[^:]*):(?/home/.+):/bin/bash@In this case, the variable shell is no longer needed, so you can remove it from the list of the variables. You also have to update the CREATE function to make sure that the home dir will always be under /home, and you have to make sure that the variable home_dir is read only.
useradd -m -d /home/{$params.object_id} -c "{$params.comment}" -p {$params.password} {$params.object_id}How to handle optional empty variables
The comment is an optional parameter, so you need to make sure that the execution of the CLI command useradd will not fail if no comment is passed as a parameter.
This can be achieved with a bit of scripting in the CREATE function:
{if empty($params.comment)}
useradd -m -d /home/{$params.object_id} -p {$params.password} {$params.object_id}
{else}
useradd -m -d /home/{$params.object_id} -c "{$params.comment}" -p {$params.password} {$params.object_id}
{/if}